Face Proportions for Drawing: 7 Rules for Better Portraits
A practical construction guide for placing the head, eyes, nose, mouth, ears, and jaw without turning classic guidelines into rigid rules.

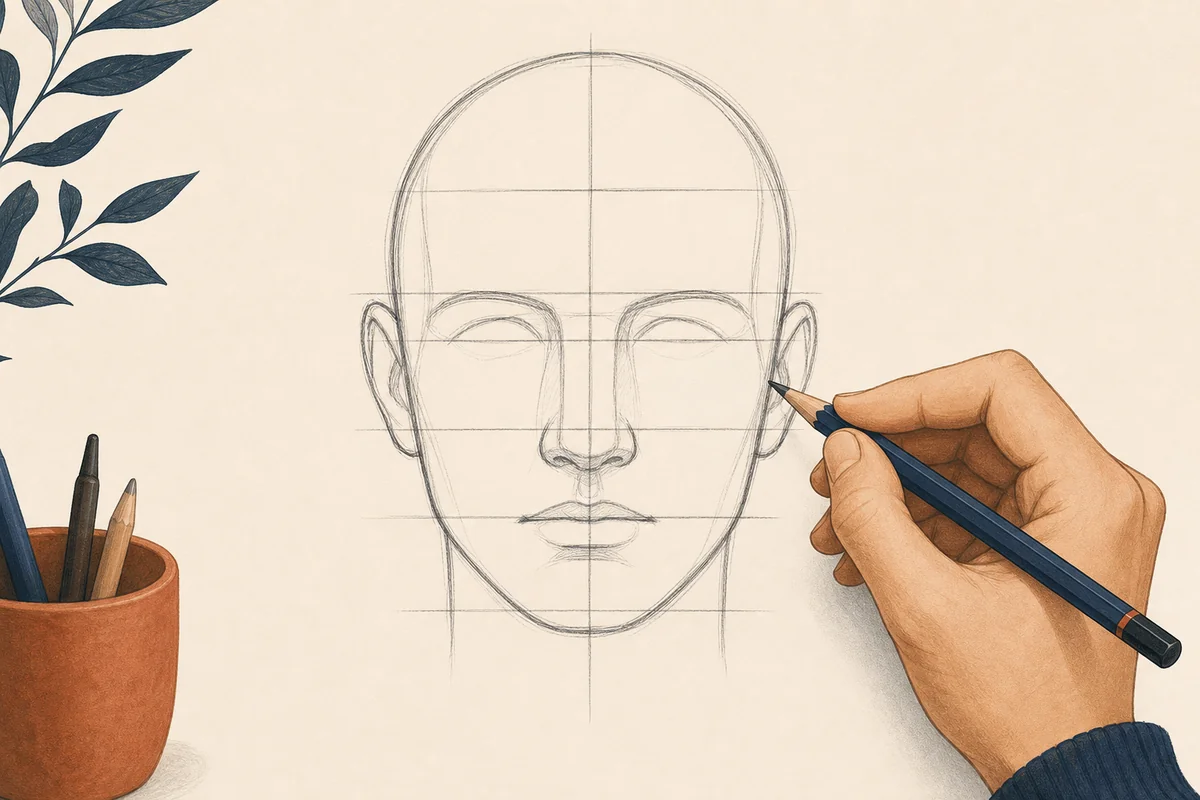
What Do Face Proportions Mean in Drawing?
When artists talk about face proportions, they mean the relationships between landmarks rather than a list of isolated measurements. The height of the forehead connects to the eye line; the eye line connects to the nose base; the nose base helps position the mouth and chin. A portrait feels convincing when those relationships describe the same head in space.
Many beginner guides use a symmetrical front-facing head because it makes the relationships easy to see. That does not mean every face is symmetrical, every age has the same distances, or every drawing style should use the same grid. The goal is to create a dependable scaffold that you can compare with your reference and then adjust.
Use rules as a scaffold
A proportion rule is a starting measurement. The reference, the head angle, the subject's age, and your chosen style decide how far the final drawing moves away from that starting point.
Start With the Head, Not the Features
The most common proportional mistake is drawing the eyes, nose, and mouth before deciding how large the skull and jaw are. Small features can look carefully rendered and still feel wrong if the underlying head is too tall, too wide, or tilted in a different direction from the reference.
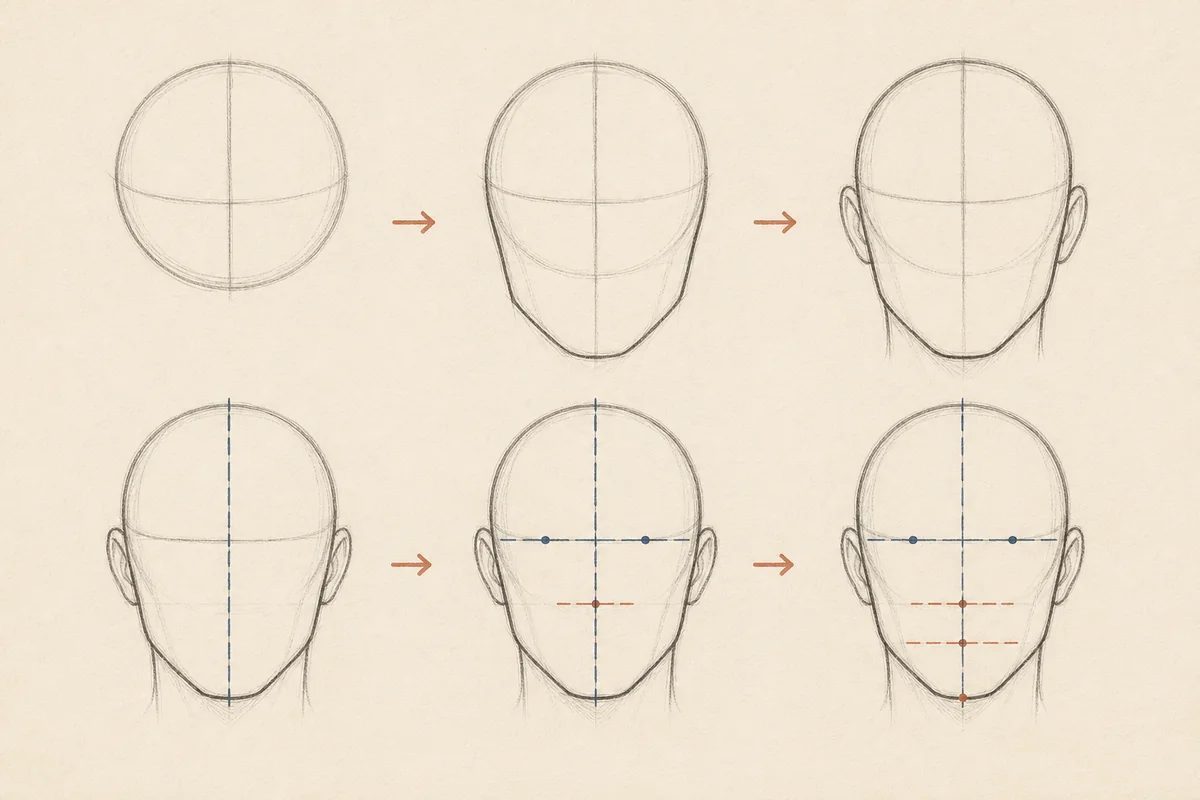
- Block the cranium: Draw a light sphere or egg shape. Think about the back and sides of the skull, not only the face seen from the front.
- Add the jaw as a separate volume: Attach the cheek and jaw planes beneath the cranium. The chin is not the bottom of an oval; it is the end of a three-dimensional wedge.
- Find the centerline: Run a light line over the front of the head. It should bend when the head turns and should not remain a flat vertical line in a three-quarter view.
- Mark the big horizontal guides: Use the brow or eye line, nose base, mouth line, and chin as broad checkpoints before drawing lashes, lips, or hair strands.
Keep these construction lines light enough to revise. The first pass is not a test of accuracy; it is a way to make the next comparison visible.
Seven Practical Face Proportion Rules
The following rules work well as a beginner checklist for a neutral adult head facing forward. Treat them as reference ranges. A real subject may have a higher or lower hairline, a shorter midface, a wider jaw, a longer nose, or a different eye-to-mouth distance.
| Landmark | What to check | Why it matters |
|---|---|---|
| Cranium | Width, height, and tilt | Sets the scale for every feature |
| Centerline | Bend and direction over the head | Controls symmetry and turn |
| Eye line | Height and spacing | Anchors the upper face |
| Nose base | Vertical interval and projection | Connects the middle and lower face |
| Mouth and chin | Lower-face length and width | Defines expression and jaw balance |
| Ears and neck | Height, angle, and attachment | Shows perspective and head structure |
1. Separate the skull from the face
The visible face is usually narrower than the cranium. If you draw the outline as one flat oval, the forehead and side planes often become too small.
2. Place the eyes around the vertical middle
In a neutral adult head, the eye line often sits near the midpoint of the full head height. Hair and forehead shapes can make the visible face look as if the eyes are higher, so measure the whole head rather than the chin-to-hair section only.
3. Leave roughly one eye-width between the eyes
The gap between the eyes is a useful first estimate for eye spacing. Compare it with the actual inner corners, because expression, perspective, and a narrow or broad bridge can change the apparent gap.
4. Align the nose base below the eye line
Use the distance from the brow or eye area to the nose base as a major vertical interval. Avoid placing the nose by guessing its tip; first locate the underside and the plane that faces the viewer.
5. Keep the mouth inside the lower-face structure
The mouth is not halfway between the nose and chin by default. Mark the nose base, upper-lip shadow, mouth opening, and chin as related points, then adjust for the subject's lower-face length.
6. Let the ears follow the main vertical interval
In a neutral view, the top and bottom of the ear often sit somewhere between the brow and nose base, but the exact range varies. Use the ear as a perspective and head-angle clue, not a fixed sticker.
7. Check the jaw and neck against the cranium
A jaw that is too narrow or a neck that is too thin can make every facial feature seem misplaced. Compare the jaw width, cheek width, and neck attachment as a single structural group.
These rules are most useful when you check several at once. If the eye line, nose base, mouth, and jaw all agree with the reference, minor differences in one measurement are usually easier to correct.
How Head Angles Change the Landmarks
A front-facing grid is easy to memorize, but portraits become more convincing when the guides respond to the turn and tilt of the head.
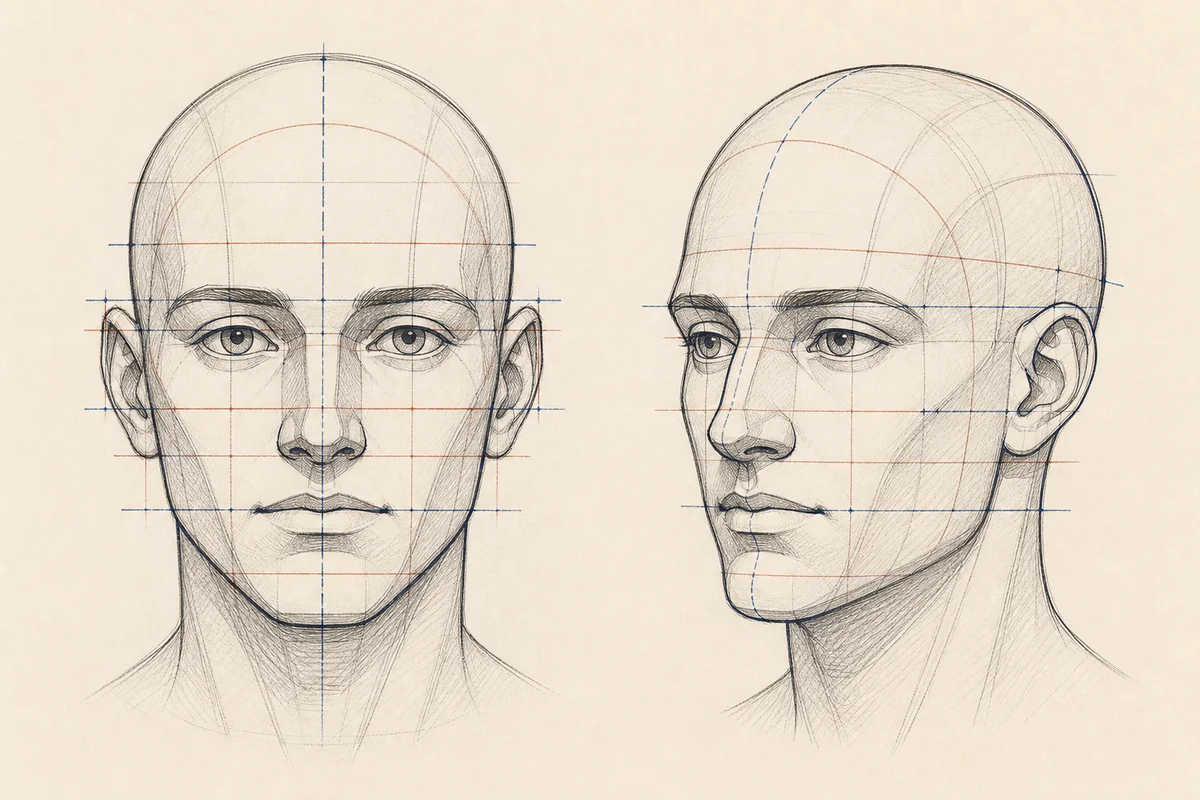
For a three-quarter view, the centerline curves toward the nearer side of the face. The far eye appears closer to the centerline, the far cheek narrows, and the far side of the mouth becomes shorter. Do not simply slide a complete front-facing face sideways; wrap the features around the head volume.
For a head tilted up or down, horizontal guides become curved arcs. Looking down usually reveals more of the top planes and changes the visible spacing between the brow, nose, mouth, and chin. Looking up does the opposite. Light contour guides are more reliable than memorized numbers because they show how each landmark sits on the same form.
Common Face Proportion Mistakes
When a portrait feels close but not convincing, the problem is often structural rather than a lack of detail. Check these errors before redrawing eyelashes or hair.
- Starting with two eyes: The eyes become the anchor, but the skull and jaw are built around them afterward. Block the head first so the eye spacing belongs to the subject's head.
- Using the hairline as the top of the head: Hair can hide the true skull shape and can be styled high, flat, or pulled back. Estimate the cranium even when the hair is prominent.
- Treating the thirds as equal in every subject: Equal facial thirds are a useful comparison, not a universal portrait formula. Age, expression, camera angle, and individual anatomy all change the visible divisions.
- Ignoring perspective: A nearby eye, cheek, or side of the jaw may appear larger. If the reference is not perfectly frontal, use the centerline and wrapping guides instead of forcing bilateral symmetry.
- Darkening the guide too early: Heavy construction lines make corrections feel like failures and can hide the larger shape. Keep the scaffold light until the main relationships are stable.
A Repeatable Practice Workflow
A short, repeatable study is more useful than copying one polished portrait once. Use the same sequence with different ages, angles, and expressions so you learn which rules are stable and which need adjustment.
- Choose a simple reference: Start with a clear, unfiltered portrait where the eyes, nose base, mouth, jaw, and ears are visible.
- Draw only the head volume: Spend one minute on the cranium, jaw, neck direction, and tilt. Do not add eyelashes or hair detail yet.
- Add five checkpoints: Mark the centerline, eye line, nose base, mouth line, and chin. Compare their spacing before drawing feature contours.
- Build features as planes: Place the eye sockets, nose wedge, muzzle, lips, and cheek planes. Think about depth, not just outlines.
- Compare negative spaces: Look at the gaps between the eyes, nose, mouth, jaw, and ears. Negative spaces often reveal a proportion error faster than the features themselves.
- Review in reverse: Flip the drawing or reduce it to a thumbnail. If the head still reads at a small size, the large proportions are probably doing their job.
Practice variation, not perfection
Repeat the same construction with different references. Your aim is to recognize when a guideline needs to bend, shorten, widen, or move—not to make every subject fit one ideal grid.
Drawing Proportions vs Photo Analysis
Face proportions for drawing and photo-based face analysis use related words but answer different questions. A drawing guide helps you construct a believable head from a reference. A photo calculator measures visible landmarks under one camera angle, crop, expression, and lighting setup.
If you want to understand your own facial thirds, midface balance, symmetry, or golden-ratio cues, use a standardized photo and read the result as educational context. Our Face Proportions Guide explains how these measurement systems fit together, while the Facial Thirds Calculator can help you inspect one specific vertical relationship. Neither kind of result should be treated as a universal beauty verdict.
FAQ
Further reading
- For general portrait construction practice: The Virtual Instructor
- For structured drawing lessons and anatomy study: Proko
- For beginner-friendly portrait drawing courses: 21 Draw
Last updated: August 2, 2026