High vs Low Cheekbones: How to Tell Where Yours Are
A practical guide to cheekbone placement, photo-based self-checks, and the difference between describing facial structure and judging beauty.

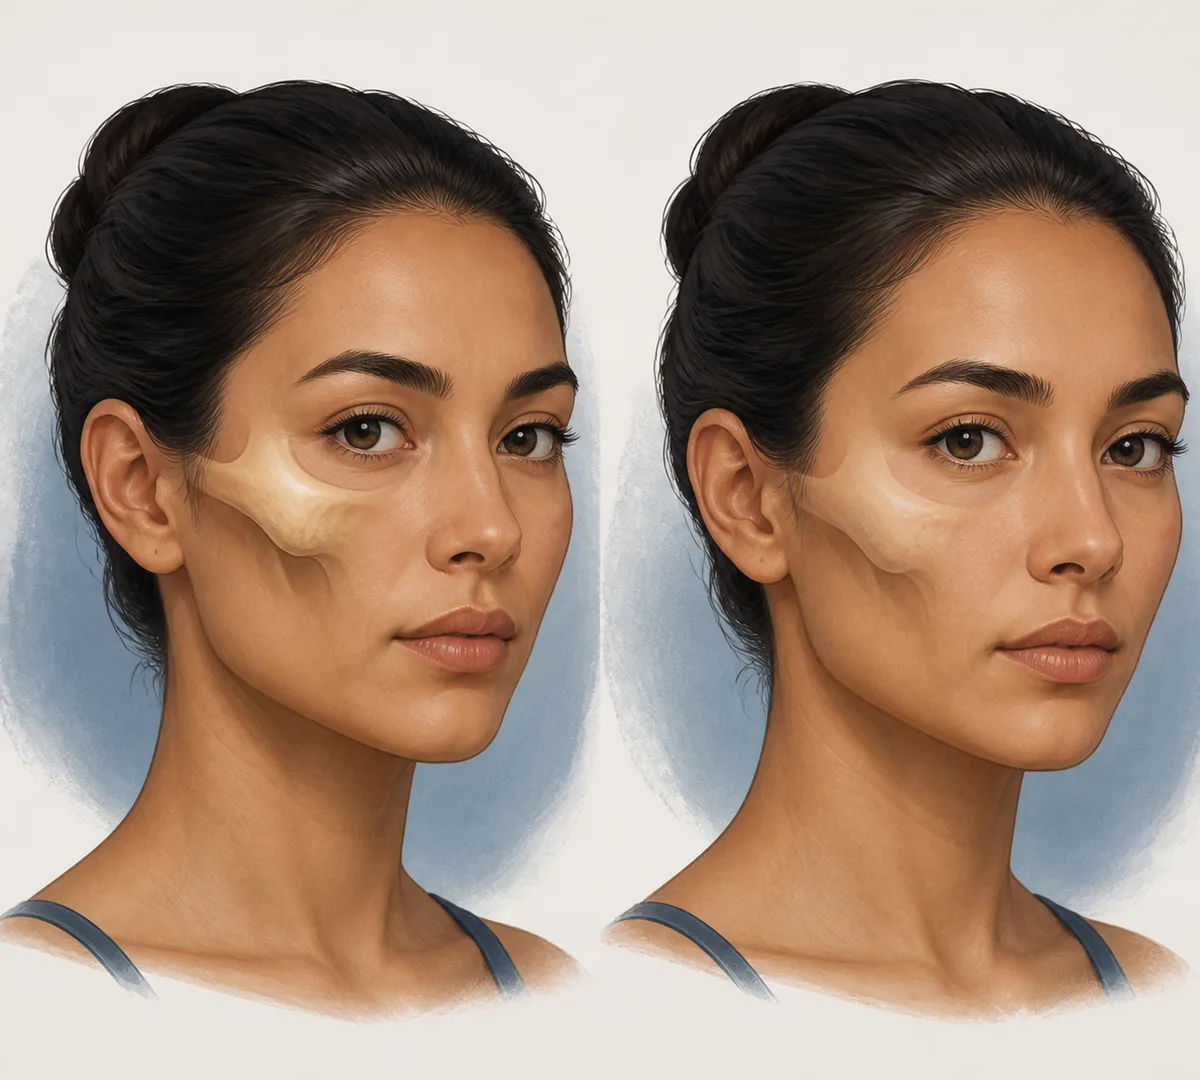
What Are Cheekbones?
Cheekbones are the visible facial contour created mainly by the zygomatic bones, which sit on each side of the face between the eye socket, nose, and cheek. In everyday beauty language, people use cheekbone height to describe where the upper cheek appears most prominent and how clearly it transitions toward the temple and midface. The bone is only one part of what you see: skin, facial fat, muscle, age, expression, and lighting all affect the surface contour.
That is why two people with similar cheekbone anatomy can look very different in photos. A stronger shadow under the cheek, a lifted expression, or a camera placed slightly above eye level can make the cheekbone look more prominent. Conversely, soft frontal light, a relaxed face, or fuller soft tissue can make the same structure look less defined. A useful guide should explain the pattern without pretending that one appearance is the correct one.
Use the terms descriptively
High and low cheekbones describe a visual relationship between the cheek contour and nearby landmarks. They do not determine attractiveness, health, personality, or what a face should look like.
High vs Low Cheekbones: What Is the Difference?
When people compare high and low cheekbones, they are usually comparing the apparent vertical position and forward projection of the upper cheek. The comparison is relative, not a precise measurement with one accepted cutoff. Look for the highest point of the cheek contour, the shadow beneath it, and the path from the cheek toward the nose, temple, and jaw.
| Pattern | Common visual description | Important caution |
|---|---|---|
| Higher cheekbones | The upper-cheek contour may sit closer to the lower eye area and show a clearer plane or shadow beneath it. | Lighting, leanness, makeup, and camera angle can create the same impression. |
| Lower cheekbones | The strongest cheek contour may appear farther down or blend more gradually into the middle of the cheek. | Softer tissue and frontal light can reduce visible definition without changing the bone. |
| Between or mixed pattern | Many faces do not fit a clean high/low label, and the two sides may have different projection. | The categories are descriptive shortcuts, not standardized medical measurements. |
A high-cheekbone or low-cheekbone description can be useful when it helps you understand face shape, makeup placement, portrait drawing, or photo angles. It becomes misleading when it is turned into a strict attractiveness score. Many faces sit between the two descriptions, and left and right sides may not match perfectly.
How to Tell Where Your Cheekbones Sit
You can make a reasonable visual estimate without measuring millimeters. Use the same photo setup for every comparison and treat the result as a description of one image, not a permanent verdict about your face.
- Choose a level photo: Use a front-facing or gentle three-quarter image with the camera near eye height, the head upright, and both cheeks visible.
- Relax the expression: Keep the jaw unclenched and the mouth neutral. Smiling, sucking in the cheeks, or tightening the lower eyelids can change the contour.
- Find the upper-cheek highlight: Look for the area that catches light or creates the strongest transition under the eye and beside the nose. This is the visual cheekbone plane, not a single dot.
- Trace the contour outward: Notice whether the contour sits relatively close to the lower eye area or appears farther down toward the middle of the cheek as it moves toward the temple.
- Compare more than one image: Repeat the check with two or three level photos. If the impression changes sharply, the original image was probably affected by angle, light, lens distance, or expression.
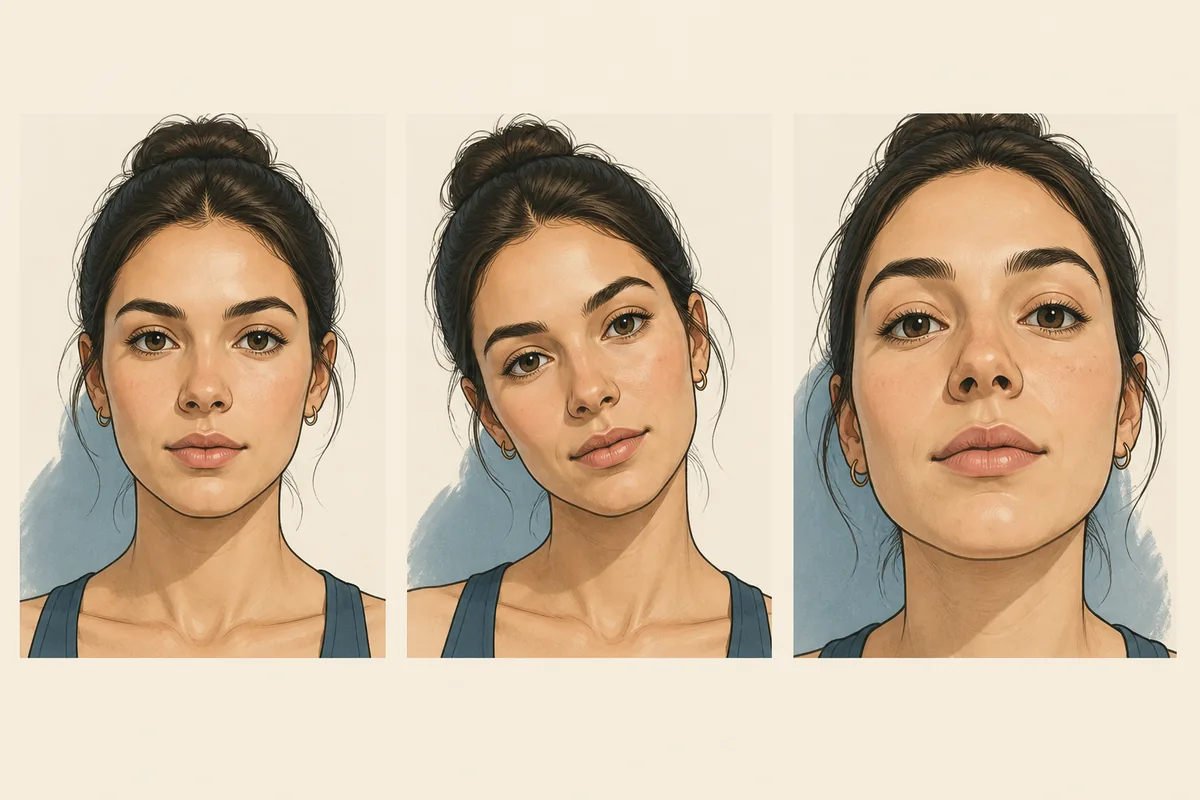
A mirror can help you notice the contour in motion, while a photo helps you compare it with other features. Avoid pressing on the cheek or using a single shadow as proof of bone position. If you need precise anatomy for a clinical, dental, or surgical question, use a qualified professional rather than an online label.
Photo Mistakes That Change the Reading
The phrase high vs low cheekbones often describes a photo impression, so the photo itself needs to be controlled. These common variables can make the same face look more sculpted or softer within seconds.
- Head tilt: Tilting the head changes the vertical relationship between the cheek, eye, nose, and jaw. One side may look higher simply because the face is rotated.
- Camera height: A camera above eye level can deepen shadows under the cheek, while a low camera can stretch the lower face and change the apparent projection.
- Close lens distance: A close selfie exaggerates the center of the face and may make the nose, cheek, or midface look different from a normal-distance portrait.
- Lighting direction: Side light reveals planes and shadows; flat front light reduces them. Compare photos in similar soft lighting before deciding that the structure changed.
- Expression and styling: Smiling, contour makeup, facial hair, hairstyle, and even a raised brow can alter the visible border of the cheek without changing the bone.
For a repeatable self-check, use a clean lens, a neutral expression, a level camera, and soft light from the front. The goal is not to erase natural variation; it is to avoid confusing a temporary image effect with a stable facial feature.
Cheekbones, Face Shape, and Facial Harmony
Cheekbone placement is one part of the midface and should be read alongside forehead width, jaw width, face length, eye spacing, nose projection, lips, chin, and left-right balance. A face-shape guide focuses on the outer outline and the relative widths of the forehead, cheek area, jaw, and overall face. A cheekbone guide focuses more narrowly on the upper-cheek plane and where it appears to project.
Facial harmony is broader still. It describes how several features relate in a particular face and image, not whether every feature matches one ideal ratio. If you use an online analyzer, combine the result with a standardized photo and treat the output as educational context. A symmetry result, facial thirds result, or harmony score should not override your own observation or a professional assessment when the question is medical or functional.
What This Guide Cannot Tell You
A web article cannot determine the exact location of your zygomatic bone, diagnose a facial condition, or predict how your face will age. It also cannot tell you whether a cosmetic treatment is appropriate. High and low are informal appearance terms, and different communities may use them slightly differently.
Be especially careful with advice that treats a normal feature as a defect or promises that chewing, massage, exercises, or a single product can reshape adult facial bones. If you have pain, a new swelling, a sudden change, trouble opening the mouth, numbness, or a concern after an injury, seek medical or dental advice instead of relying on a beauty checklist.
- A photo-based label is not a diagnosis.
- High cheekbones are not automatically more attractive, healthy, or youthful.
- Low cheekbones are not a flaw and do not predict a person's appearance in every angle.
- Left-right differences are common and can be exaggerated by cameras.
- Professional clinical questions require an in-person assessment.
A better conclusion
Use cheekbone terminology to describe what you see, then return to the full face, the quality of the image, and the person's own goals.
High vs Low Cheekbones FAQ
References and Further Reading
- For an anatomy overview of the cheekbone region and the zygomatic bone, see: TeachMeAnatomy: Zygomatic Bone
- For a broader discussion of facial proportions and measurement limits, read: Face Proportions Guide
- For left-right balance and camera distortion checks, use: Face Symmetry Test
Last updated: August 10, 2026